Follow Me On Social Media!

The Best Homemade Crème Brûlée: Indulgence Made Easy
Introduction to The Best Homemade Crème Brûlée
Imagine standing in your kitchen, the comforting aroma of vanilla wafting through the air, as you prepare the best homemade crème brûlée. This timeless dessert offers an exquisite contrast of textures—from the silky custard to the satisfying crackle of caramelized sugar on top. But what makes it truly special is the joy it brings, whether it’s a luxurious treat after a long day or the highlight of a dinner party.
Crème brûlée is not just an indulgence; it’s a classic French delicacy that has captured hearts around the globe. Its name, meaning “burnt cream,” elegantly describes the transformation of sugar into a crisp, glass-like layer that creates a delightful crunch, perfectly complementing the creamy custard below.
Why should you try making the best homemade crème brûlée? Well, it opens up a world of culinary possibilities and gives you the chance to impress your friends and family with your baking prowess. Imagine surprising your dinner guests with a dessert that’s not only visually stunning but also a feast for the senses. The beauty of this recipe lies in its simplicity—using just a few high-quality ingredients will elevate your creation from good to unforgettable.
The process of making crème brûlée may sound daunting, but trust me; it’s more accessible than you think. With patience and a little love, you’ll be able to create a dessert that’s restaurant-quality right in your own kitchen. Plus, the satisfaction of mastering this classic dish adds an immense sense of accomplishment.
What makes homemade crème brûlée a must-try dessert?
In addition to its irresistible taste, the best homemade crème brûlée shines in its versatility. You can infuse flavors like citrus, chocolate, or even espresso, transforming a traditional dessert into something uniquely yours. It’s perfect for any occasion, from celebrations to quiet evenings at home. And let’s not forget, there’s something undeniably rewarding about cracking that sugar crust with a spoon—it’s an experience all on its own!
Dive into this culinary adventure, and let’s bring the elegance of crème brûlée into your kitchen.

Key Ingredients for The Best Homemade Crème Brûlée
Making the best homemade Crème Brûlée requires a thoughtfully selected lineup of ingredients that work in harmony to create that signature creamy, custardy delight topped with a satisfying caramel crust.
Heavy Cream
I use heavy cream for its rich texture, ensuring the custard becomes luxuriously creamy and indulgent. The higher fat content is essential in creating a smooth, velvety result that elevates the dessert to another level.
Milk
For this recipe, I prefer whole milk or 2% as they provide a perfect balance of creaminess without being overly heavy. Skim milk just won’t cut it if you want that decadent consistency!
Vanilla Bean Paste
For a depth of flavor that speaks luxury, I opt for vanilla bean paste. It adds those tiny flecks of vanilla, creating not only a stunning visual appeal but also a robust vanilla aroma that will have your guests swooning.
Egg Yolks
Egg yolks are absolutely crucial for crafting a rich custard. They impart the necessary fat content, resulting in that ultra-smooth texture we all crave in a Crème Brûlée.
Granulated Sugar
A blend of sugars sweetens the custard while also preparing the topping for that beautifully caramelized layer. The right amount of granulated sugar plays a key role in your Crème Brûlée experience.
Why You’ll Love This Homemade Crème Brûlée
Indulgent Flavor Profile
Crème brûlée is a classic dessert that never fails to impress with its indulgent flavor profile. This sumptuous treat features a rich custard base, combining eggs, cream, and vanilla, topped with a perfectly caramelized sugar crust. With each spoonful, you’ll experience a delightful contrast between the creamy, buttery custard and the satisfying crack of the caramel layer. It’s a luxurious experience that transports you to a charming Parisian café with every bite.
Simple Yet Impressive
One of the best aspects of the best homemade Crème Brûlée is how effortlessly impressive it is. Despite its gourmet appearance, this dessert involves straightforward techniques that even novice cooks can master. The process requires just a handful of ingredients and a little patience. As you drizzle the sugar on top and create that golden crust, watch as your friends and family marvel at your culinary skills. You don’t need a chef’s hat—just a desire to create something beautiful and delicious.
Perfect for Any Occasion
Whether you’re celebrating a special birthday, hosting a dinner party, or simply treating yourself on a cozy evening, homemade Crème Brûlée is the ideal dessert. Its elegant presentation makes it suitable for formal gatherings, while its comforting flavor is perfect for casual get-togethers. With versatility and ease, this delightful dish can adapt to any occasion, ensuring that you’ll love making it time and time again. Treat yourself and your loved ones to this elegant masterpiece that brings joy to every plate!
Variations on Homemade Crème Brûlée
Creating the best homemade Crème Brûlée isn’t just about following a recipe; it’s an opportunity for culinary creativity. This custard dessert is the perfect canvas for various flavors and textures, allowing you to impress your friends with delightful twists that elevate the classic dish.
Flavor Infusions
Infusing your crème brûlée with unique flavors can turn a standard dessert into an unforgettable experience. Consider:
- Vanilla Bean: For a more intense vanilla flavor, use real vanilla bean pods instead of extract. Scrape the seeds into the mixture for a delightful aroma.
- Citrus Zest: Add lemon, orange, or lime zest to brighten up the flavor profile.
- Herbs and Spices: A hint of rosemary or a sprinkle of cardamom can introduce an exciting complexity.
Alternative Toppings
While the classic sugar crust is a must, you can explore creative alternatives:
- Chocolate Shavings: After caramelizing, top with rich chocolate curls for an indulgent finish.
- Candied Nuts: Sprinkling crushed, caramelized nuts will add both crunch and sweetness.
- Fresh Fruits: Berries or figs provide a fresh, seasonal touch that will impress your guests.
Dietary Adjustments
Making the best homemade Crème Brûlée doesn’t need to exclude those with dietary restrictions:
- Non-Dairy Versions: Use coconut or almond milk instead of cream for a dairy-free dessert.
- Sugar Substitutes: Consider using agave syrup or coconut sugar to cater to those monitoring their sugar intake.
- Vegan Option: Substitute eggs with silken tofu or cashew cream for a creamy texture without the use of animal products.
Explore these variations to customize your Crème Brûlée experience!
Cooking Tips and Notes for Homemade Crème Brûlée
Creating the best homemade Crème Brûlée is a labor of love, and there are a few key tips to ensure your dessert turns out perfectly every time.
Optimal Temperature Control
To achieve a smooth, rich custard, controlling your baking temperature is paramount. Bake your Crème Brûlée at a low temperature, ideally around 325°F (160°C). This low and slow method allows the custard to set evenly without curdling. Additionally, using a water bath (bain-marie) offers gentle heat, helping maintain a consistent temperature throughout the cooking process.
Avoiding Scrambled Eggs
One of the biggest challenges with custards is preventing scrambled eggs. To avoid this pitfall, always temper your egg yolks by slowly adding the warm cream mixture while whisking continuously. This gradual process helps acclimatize the yolks to the heat without cooking them. Remember, patience is crucial; if you rush, you’ll end up with an undesirable texture.
Storage Recommendations
For the best storage practices, keep your unbaked custards in the refrigerator, covered with plastic wrap. Once baked and cooled, set the caramelized sugar topping just before serving to maintain that delightful crunchy layer. If you happen to have leftovers, store them in the fridge for up to two days (without the sugar topping) for a quick treat anytime!
Serving Suggestions for Homemade Crème Brûlée
Indulging in the best homemade Crème Brûlée is not just about relishing the flavors but also about presenting it in a way that elevates the entire dessert experience. Let’s explore how you can take this classic treat to the next level.
Garnish Ideas
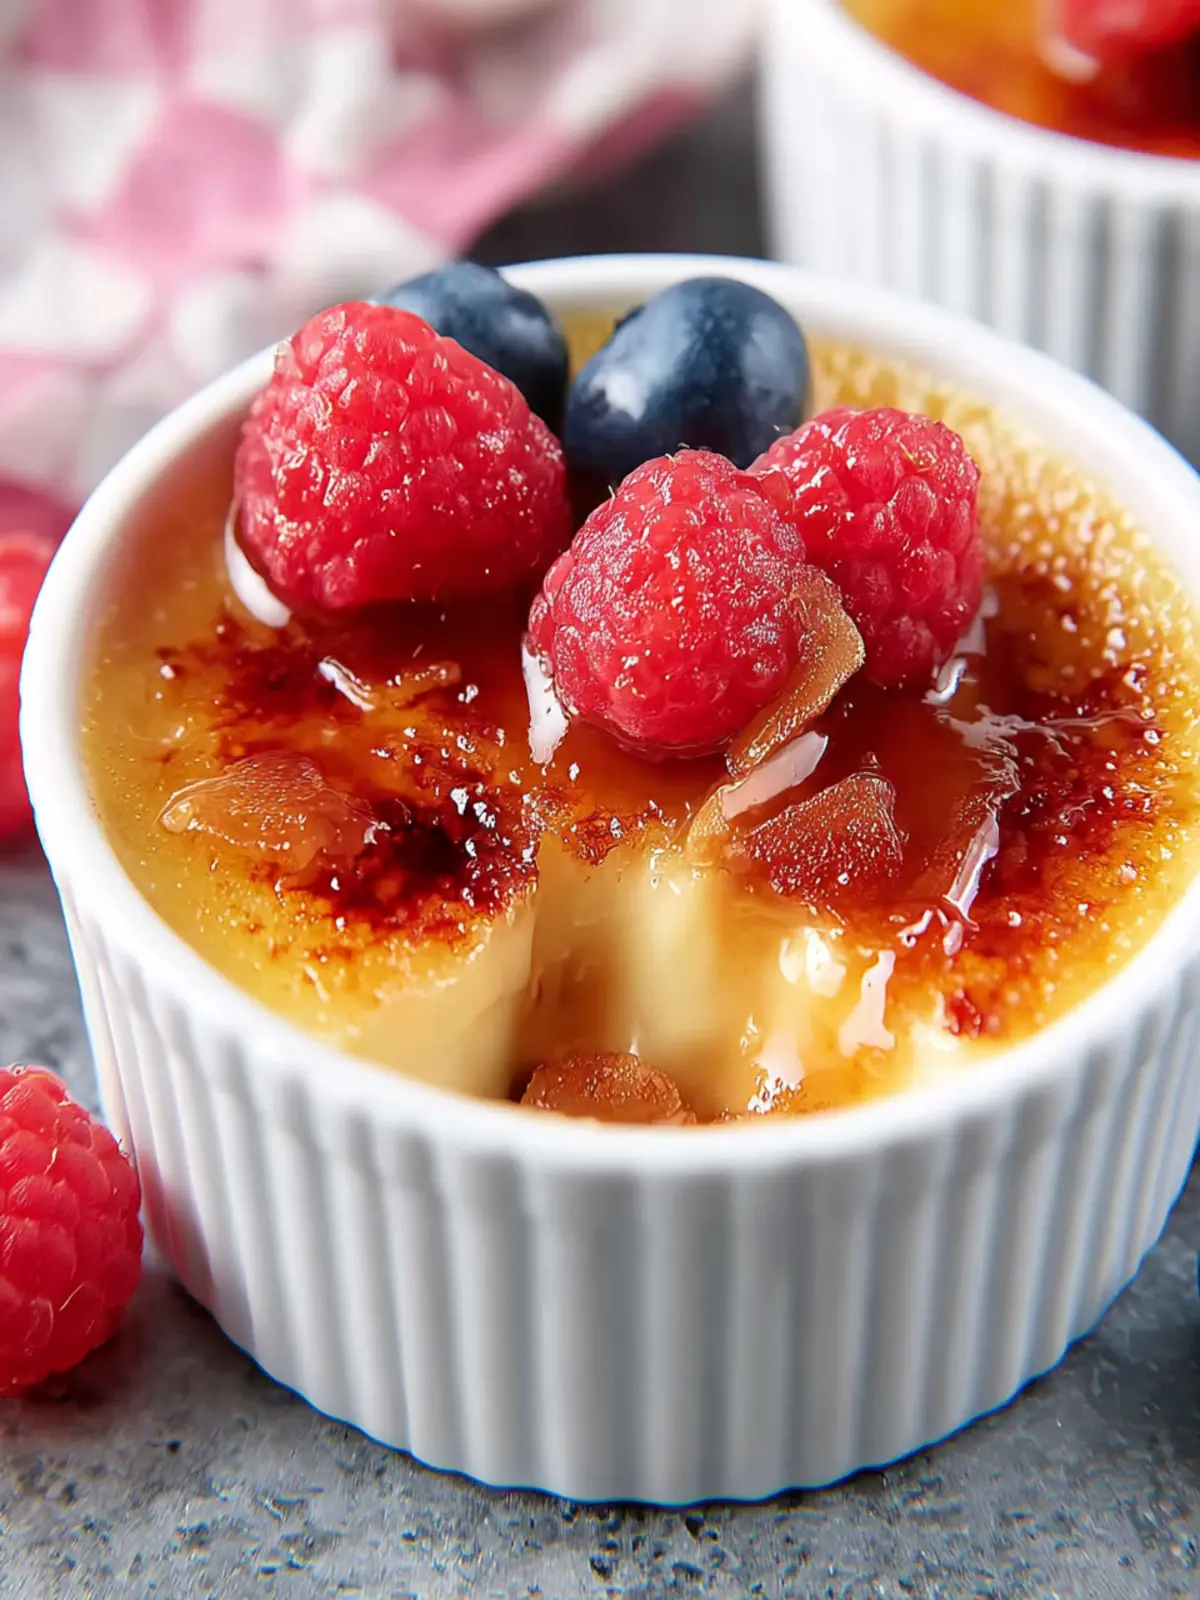
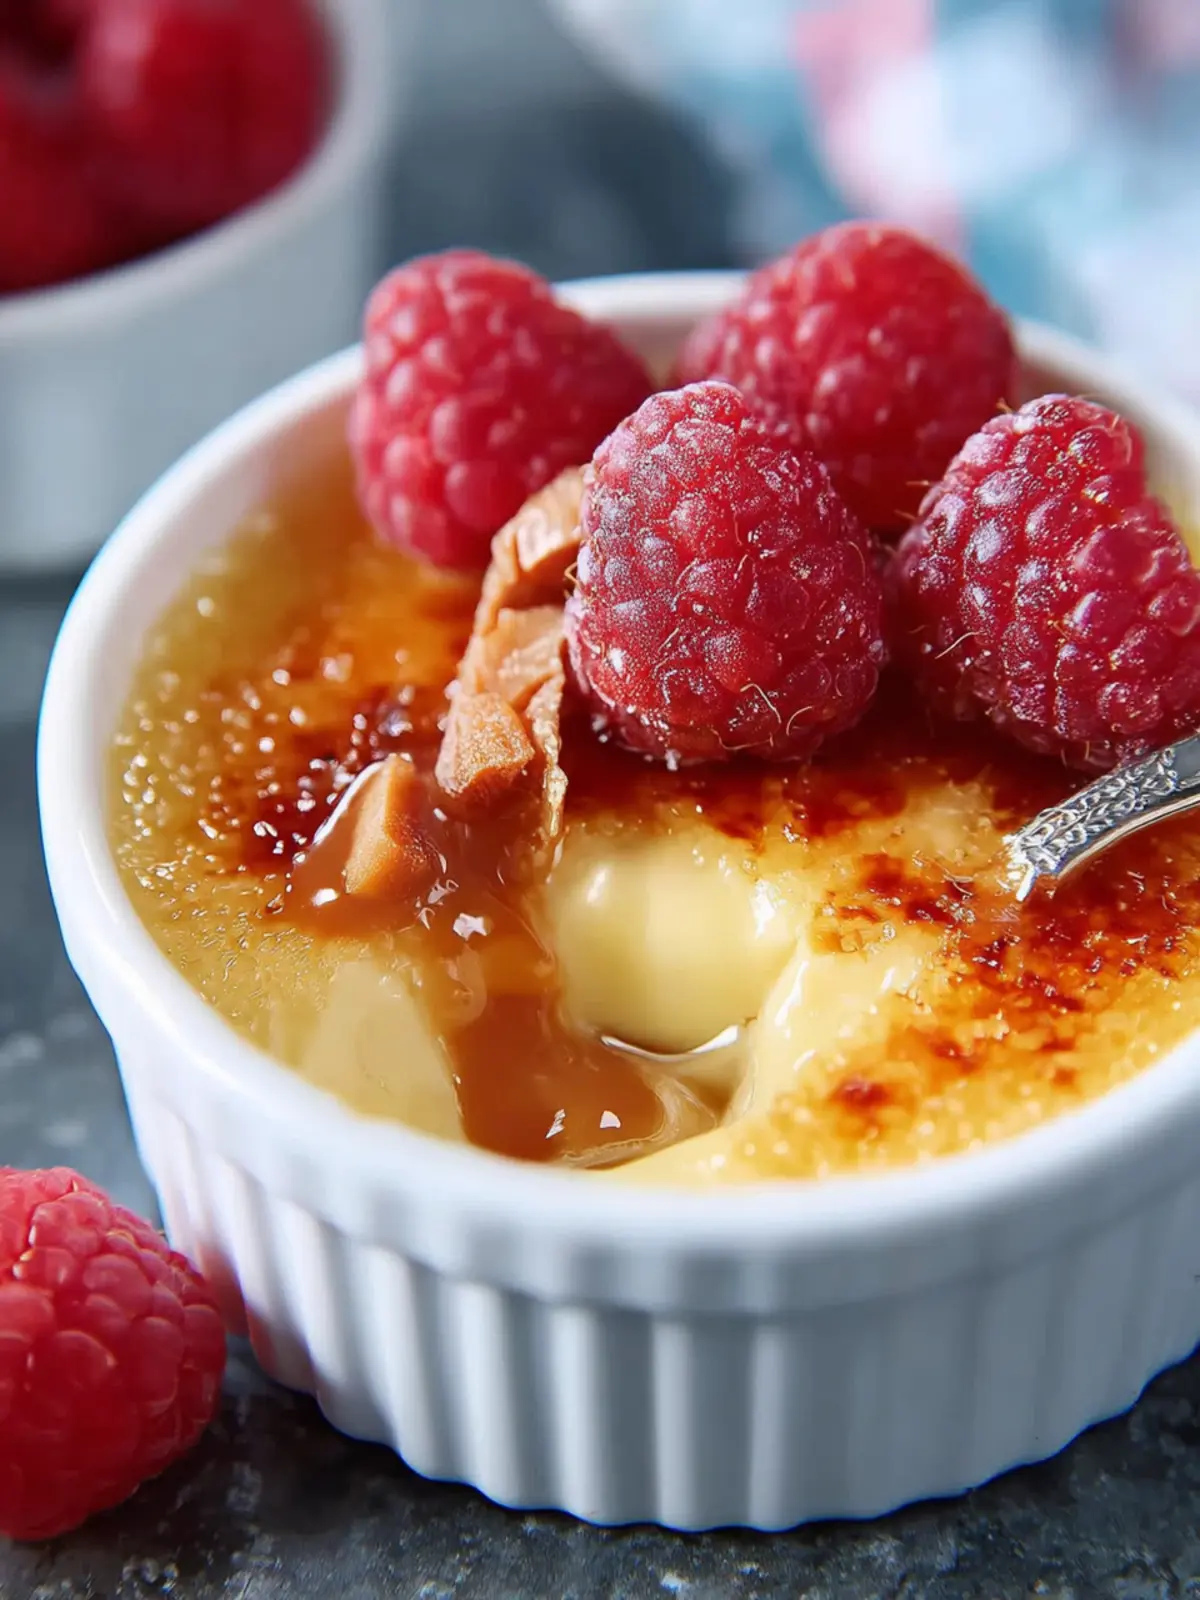
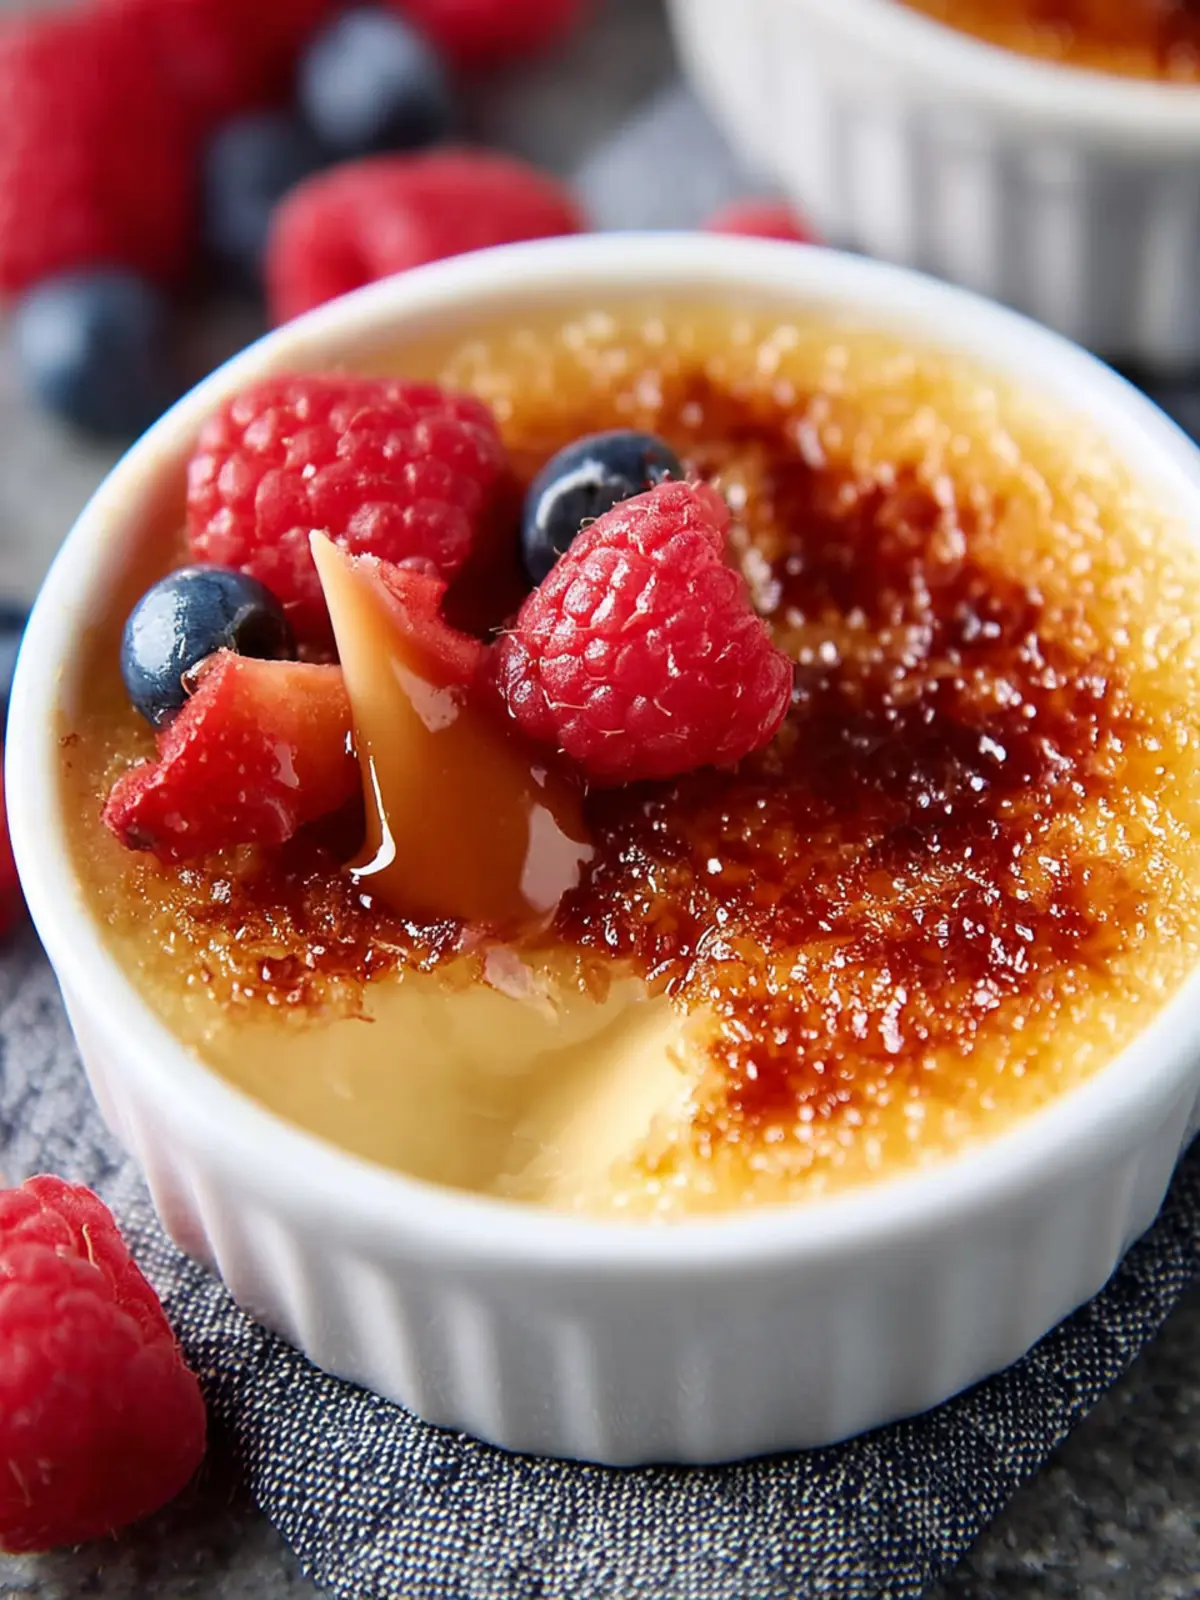
Enhance your Crème Brûlée with delightful garnishes. Fresh berries, like raspberries or strawberries, offer a tart contrast to the creamy custard. A dusting of powdered sugar or a sprig of mint adds a pop of color and freshness. For a sophisticated touch, consider infusing your vanilla with a hint of orange zest.
Pairing with Other Desserts
Don’t hesitate to serve your the best homemade Crème Brûlée alongside other desserts. A delicate fruit tart or a rich chocolate mousse can make for a stunning dessert trio. These combinations bring out different flavor profiles, making your dessert spread feel festive and well-rounded.
Presentation Tips
Presentation can truly transform your Crème Brûlée experience. Serve in elegant ramekins for a classic touch or use small glass jars for a rustic look. For added drama, consider using a kitchen torch to caramelize the sugar right before serving, allowing your guests to crack the surface fresh at the table. This interactive moment adds excitement to the dining experience!
Time Breakdown for Homemade Crème Brûlée
Creating the best homemade Crème Brûlée may sound daunting, but breaking it down into manageable chunks makes it a breeze. Here’s how to plan your time effectively:
Preparation Time
Getting started takes about 20 minutes. This includes whisking together egg yolks, sugar, and vanilla before combining with cream. Remember, the more love you pour into the prep, the richer the flavors will be.
Chilling Time
After baking, it’s essential to chill the Crème Brûlée for at least 2 hours. This step is key for allowing the custard to set properly. Use this time to enjoy a cup of coffee or catch up on your favorite show!
Baking Time
Baking in the oven takes around 30-40 minutes at a low temperature. You’ll want to check for that magical, wobbly jiggle in the center; that’s when you know it’s just right.
By the time you finish, you’ll have a delightful dessert ready to wow your friends and family!
Nutritional Facts for Homemade Crème Brûlée
Creating the best homemade Crème Brûlée is not just about indulging in dessert; it’s also about appreciating the balance of flavors and textures. As you savor that silky smooth custard topped with a crackling caramel layer, it’s essential to understand its nutritional profile.
Calories
A single serving of homemade Crème Brûlée typically contains around 320 calories. This delightful treat is rich and satisfying, making every bite worth it.
Fats
This dessert is also higher in fat, with about 20 grams per serving, primarily from the heavy cream and egg yolks. This richness gives the best homemade Crème Brûlée its luxurious texture that melts in your mouth.
Sugars
The sweetness of Crème Brûlée comes from about 25 grams of sugar per serving. While it’s undeniably a treat, enjoying it occasionally can be part of a balanced diet, especially when shared with friends!
FAQ about Homemade Crème Brûlée
Creating the best homemade Crème Brûlée is not just a kitchen feat; it’s an experience of crafting a delightful dessert that has won hearts for centuries. Many new bakers have questions along the way, so let’s dive into some frequently asked questions to ensure your dessert journey goes smoothly.
How do I get the perfect caramelized top?
Achieving that iconic crispy caramelized layer on your Crème Brûlée requires two things: patience and the right tools. The best way to get that professional finish is to sprinkle an even layer of granulated sugar over the chilled custard. Using a kitchen torch, melt the sugar in quick, circular motions until it bubbles and turns that lovely copper color. If you don’t have a torch, a broiler can work, but keep a close eye to prevent burning!
Can I make crème brûlée ahead of time?
Absolutely! In fact, making Crème Brûlée ahead enhances the flavor. You can prepare the custard a day or two in advance and store it in the refrigerator, covered with plastic wrap. Just remember to caramelize the sugar topping right before serving for that fresh, crunchy texture.
What are common mistakes to avoid?
To ensure your homemade Crème Brûlée turns out perfectly, be mindful of these pitfalls:
- Overheating the custard: Cooking too quickly can make it grainy, so low and slow is the way to go.
- Not straining the mixture: This step removes any lumps from the egg yolks, resulting in a creamy texture.
- Skipping the water bath: This trick helps cook the custard evenly and prevents cracking.
Embrace each step of the process, and you’ll be rewarded with the best homemade Crème Brûlée that impresses every time!
Conclusion on Homemade Crème Brûlée
Final Thoughts on This Delightful Dessert
When you indulge in the best homemade Crème Brûlée, you’re not just enjoying a dessert; you’re partaking in a culinary experience that dazzles the senses. The creamy richness of the custard paired with that satisfying crack of caramelized sugar creates a perfect harmony. This dessert is surprisingly simple to make at home, allowing you to impress friends and family with minimal effort. Whether served at a dinner party or enjoyed alone on a quiet evening, each spoonful delivers pure bliss. So grab those ramekins, fire up your torch, and treat yourself to this luscious delight that feels gourmet yet is entirely achievable!
Print
Crème Brûlée
- Total Time: 6 hours 15 minutes
- Yield: 6 servings 1x
- Diet: Vegetarian
Description
A rich and creamy vanilla custard topped with caramelized sugar.
Ingredients
Scale
- 3 cups heavy cream
- 1 cup milk (preferably 2% or whole)
- 1 tablespoon vanilla bean paste
- 8 egg yolks
- 1/2 cup plus 2 tablespoons granulated sugar
- 1/3 cup granulated sugar
Instructions
- In a medium saucepan, heat the cream and milk until just barely simmering and immediately remove from the heat. Stir in the vanilla bean paste.
- In a medium bowl, whisk the egg yolks and sugar together until well combined.
- Slowly ladle the hot cream mixture into the egg mixture while whisking constantly and quickly to temper the eggs.
- Preheat the oven to 325 degrees F. Place an oven rack in the middle position.
- Heat about 4 quarts of water until steaming.
- Place ramekins in a baking pan with at least 2-inch sides. If desired, place a thin towel in the bottom of the pan under the ramekins to prevent sliding.
- Ladle the cream mixture into 6 ramekins (about 7- to 8-ounce). If using flatter ramekins (4- to 5-ounce), you’ll get about 8 ramekins-full.
- Place the pan of filled ramekins on the oven rack and carefully pour the hot water into the pan around the ramekins until the water comes halfway up the sides.
- Bake the crème brûlée for 40 to 45 minutes for deep ramekins and 30 to 35 minutes for shallow ramekins, until the custard is set but still slightly jiggly in the center.
- Carefully remove the pan from the oven without splashing water into the baked crème brûlée.
- Using a large, flat spatula, remove the ramekins from the hot water and place on a cooling rack to cool completely.
- Once cooled, cover the ramekins and refrigerate until fully chilled, 6 hours or up to 3 days.
- About 30 minutes before serving, remove the ramekins from the refrigerator and blot the tops dry with a paper towel if needed. Sprinkle a tablespoon of granulated sugar over the top of each crème brûlée and tip the ramekin to scatter the sugar evenly.
- Using a kitchen torch on medium heat, run the torch slowly across the sugar until melted and caramelized.
- Serve immediately, or refrigerate uncovered for 30 to 45 minutes until ready to serve.
Notes
- For a more intense vanilla flavor, you can substitute 1 whole vanilla bean instead of vanilla bean paste.
- Prep Time: 30 minutes
- Cook Time: 45 minutes
- Category: Dessert
- Method: Baking
- Cuisine: French
Nutrition
- Serving Size: 1 ramekin
- Calories: 350
- Sugar: 30g
- Sodium: 60mg
- Fat: 25g
- Saturated Fat: 15g
- Unsaturated Fat: 8g
- Trans Fat: 0g
- Carbohydrates: 30g
- Fiber: 0g
- Protein: 6g
- Cholesterol: 200mg